
This article is dedicated to those who are run online Courses or planning to do in the near future. If so, Memberpress online courses addon is fulfilled your needs.
Yes, in this article we are explaining to you in brief, how to create an online course without knowing of complicated coding or script language?
For this you should have only one thing which is MemberPress pro plan
In addition, MemberPress is a WordPress plugin. By this plugin, you can create membership websites in minutes. Also now MemberPress WordPress plugin provides the MemberPress Courses addon.
By this plugin, you can easily create online courses on your WordPress website. Or turn your existing WordPress website into an online course website.
The first thing is first, To run an online course website you need to install the MemberPress plugin with a Basic plan. Their plan is started at $ 149 / year.
Video Tutorial
Install MemberPress Courses Add-on
Before installing the MemberPress Courses addon, you will need to install the MemberPress plugin with a basic plan. To know how to install a WordPress plugin so click here.
Followed by installing the MemberPress plugin now you will see the Courses button under MemberPress on the side bar menu of your WordPress dashboard.

So, here click on “Install and Activate Memberpress Course Add on”, it will be installed and activated automatically. After installation and activation of the Memberpress Course addon, you will be redirected to the Courses page.
Course Page

Here you start your online courses, so, click on add new. Then give a name to your new course and enter the detailed description of your course.

Add a Course Image for your course

If you want to add an image to your online course to attract your course listing page. Then set a featured image to your course. This is just like a new blog post-editing, you can find it on your sidebar under the setting button.
In addition, the featured image is looks like is in the below image.

Categorizing/Tagging Your Courses
In addition, you can categorize and add tags to your courses. This will helps users to find the categorize courses.
If you have multiple online Courses, you might want to Categorize or Tag them to help you organize them. This will be particularly useful if you need to provide access to multiple Courses when a Member buys a Membership in MemberPress.
Back on the MemberPress > Courses page, you’ll see buttons at the top for Categories and Tags.

Curriculum
Next in the curriculum tab, you can add Sections and Lessons of your course.
Add Section
Here you will need to add sections first, this means it’s the group of your lessons.

Take a look at the below image, it will some examples of your lessons sections. Here you can add lessons by expanding the sections.

After creating the lessons, your lessons are showed up on the sidebar of your WordPress dashboard. You can search for the existing lessons by the search box.

In addition you can place the lessons to any other sections by drag and drop, for this use grid icon which is on the left.

Course Settings
In the next tab, you can see the settings of the particular course. There you see the Include in Course Listing at first turn it in to enable mode. This one is the front-end display of your online courses.

Sales Page
Now goes to the second setting it will be Sales Page URL setting. This means when a user wants to buy a course from you. If he clicks on the particular course then it takes them to the payment page, so here in this sales page settings, you can enter your plan page URL.
So, your sales page URL located here on the Membership Registration URL is MemberPress > Memberships. There you will see the membership URL this is your sales page URL.

Copy the URL and past it in to here in front of sales page.

Classroom Mode settings
This option is a great way to give the best look for your courses. After enabling this option the courses display on the front-end within a self-contained interface.
So, you will find this option on MemberPress > Settings > Courses tab for the best user experience and design.
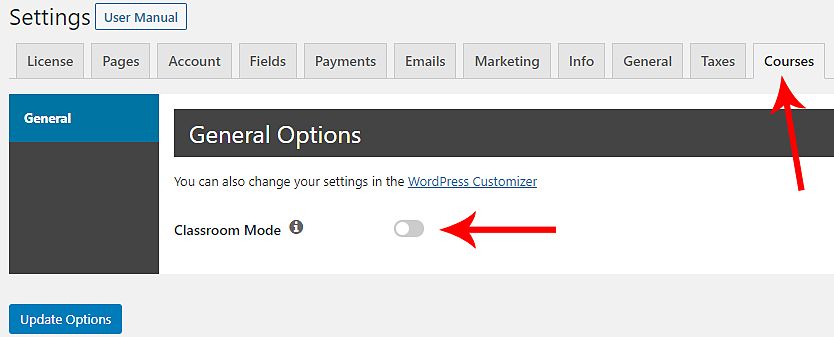
So, after enabling the classroom mode your courses are looks like this
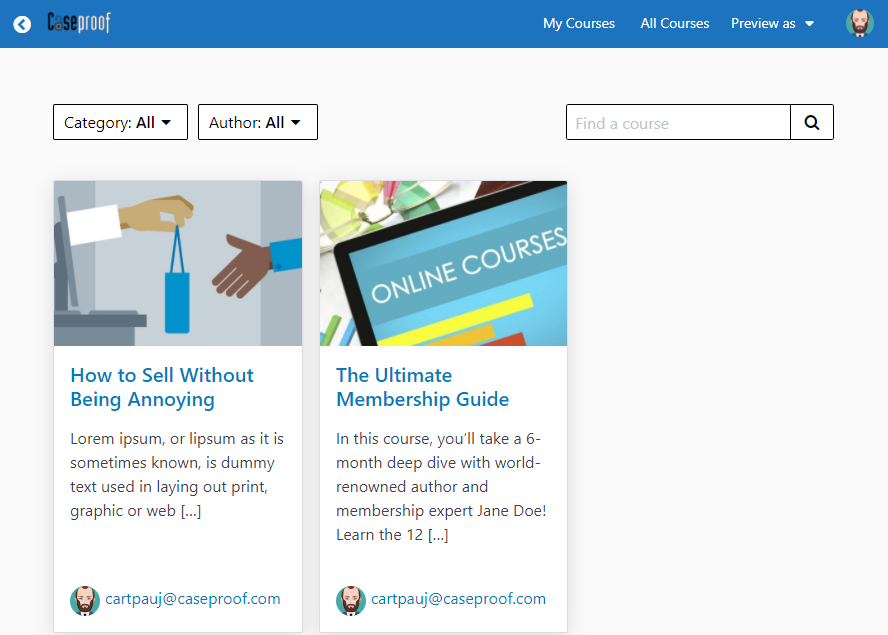
Final view of a course
When a member logging into their account and he moves to “My Course” and clicks on a particular course then the preview of the particular course looks likes showed in the image below.

Furthermore, they can see the Course overview, navigation, instructor, and see their progress through the Course.
In addition not only member can see their progress on any course. The admin also can see the progress of any members. For this, the site admin can go here on WordPress Dashboard > Users page. Then click “Edit” on that User and scroll down until you see the Course Information section.


