Do you have ever heard about scroll depth tracking?
If yes or not i think this article definitely helpful to you.
Some FAQ about Scroll Depth Tracking
What is the Scroll Depth Tracking
This service allows you to see how far a user scrolls on any page. you can easily see when your site visitors scroll 25%, 50%, 75%, and 100% down the page. This data helps you see if your visitors are actually reading your long posts and when they lose interest,
Why the Scroll Depth Tracking
When a user comes to your blog page and he is scrolling the page top-bottom while he is reading the blog post. But you don’t know what’s happening on your blog. This kind of tracking system does clear to know you all these things.
What is the benefits?
If you are having lots of long articles on your blog, scroll depth tracking is very important to know whether people are really engaged in your content or not.
In google analytics, you can see the scroll depth tracking system. But whole things as a beginner, this is nearly impossible and very tough for experienced ones.
But now monsterInsights WordPress plugin gives you this type of service very easily. You can track scroll depth tracking inside your WordPress dashboard with few clicks.
Step 1. Scroll Depth Tracking Setup in WordPress with MonsterInsights
After install and activate of MonsterInsights version 7.6.0 or later. Link MonsterInsights (Read this post: how to link MonsterInsights plugin to google analytics ) to your google analytics account to getting all types of tracking service here in WordPress dashboard.
Upon activation, go to Insights » Settings page and then click on the Engagement tab. As shown in the screenshot below, you will see the scroll tracking option enabled by default.
Step 2. Find Scroll Tracking Depth Results in MonsterInsights
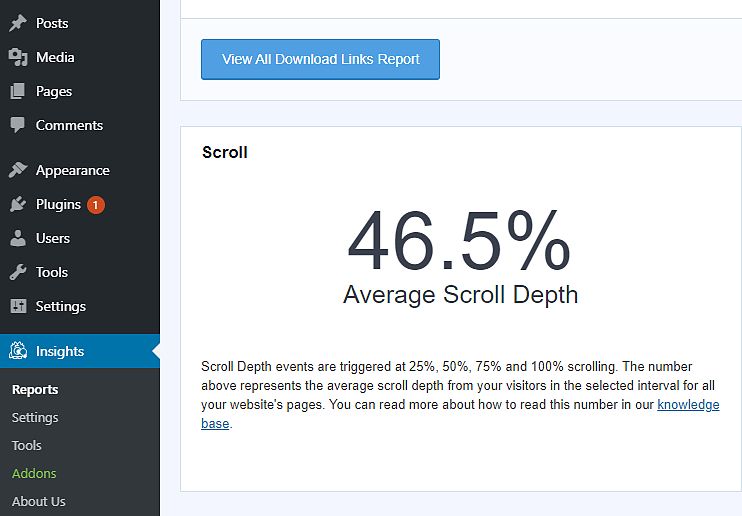
Now you can see the scroll tracking stats are bottom of the MonsterInsights publishers report after Interests section. and other helpful stats right inside your WordPress admin area.
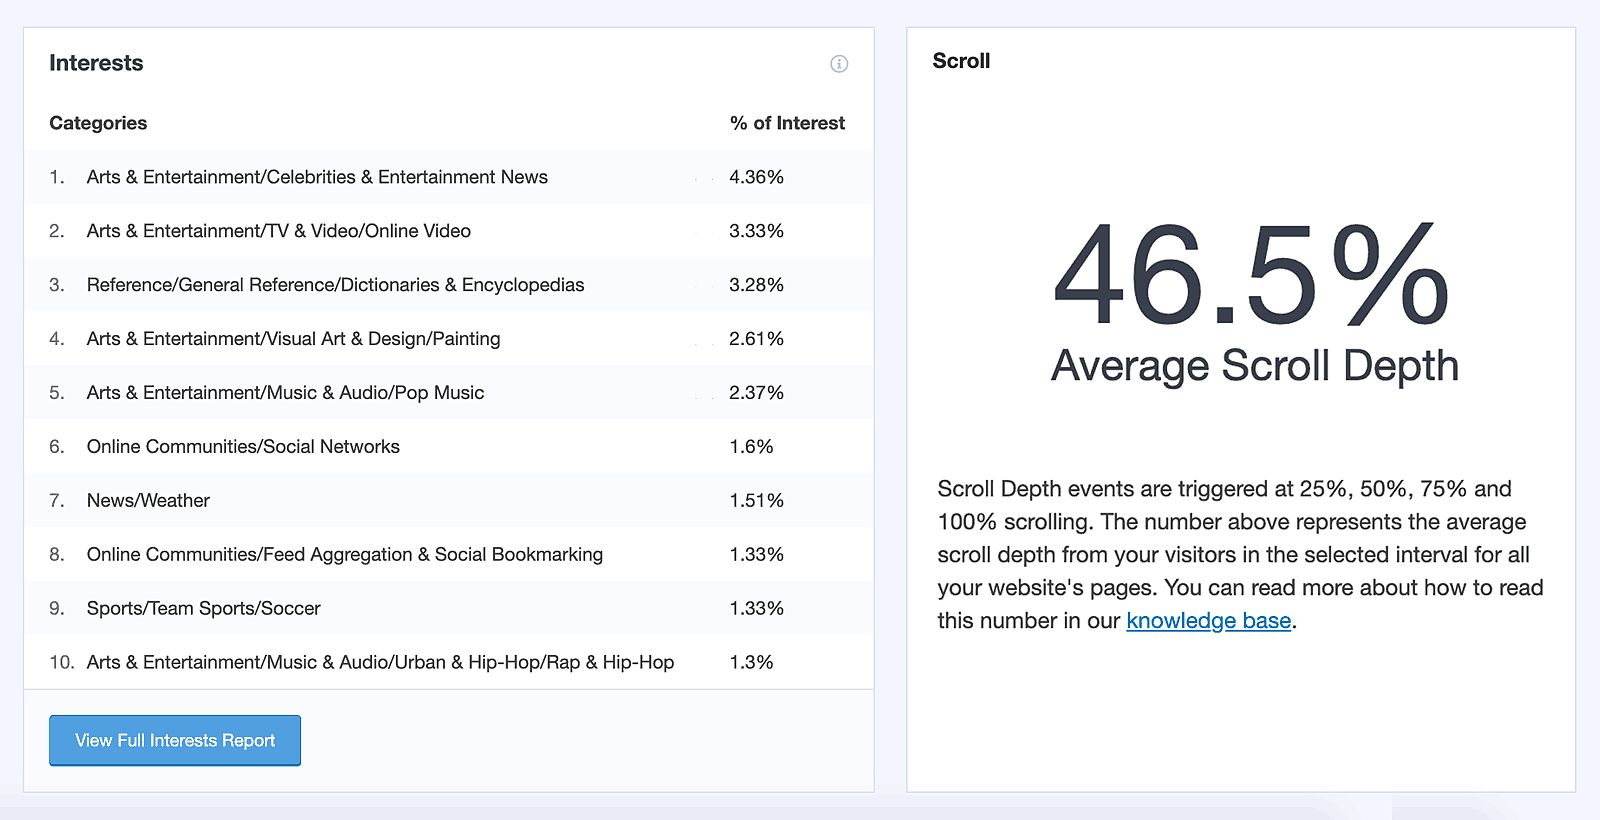
It gives you a better picture of how your visitors are interacting with your content and helps you decide to take action over your less reading content.
Please Note: While Google Analytics is properly set up and tracking everything, it does not send the data back to WordPress immediately. Depending on the size of your website, it can take between a few hours to 24 hours for reports to populate.
Step 3. Set up Scrolling Data in Google Analytics
The setup is starting in Google Tag Manager. Here don’t confusion, Google analytics only show you the data. But the whole setup is done in Google tag manager.
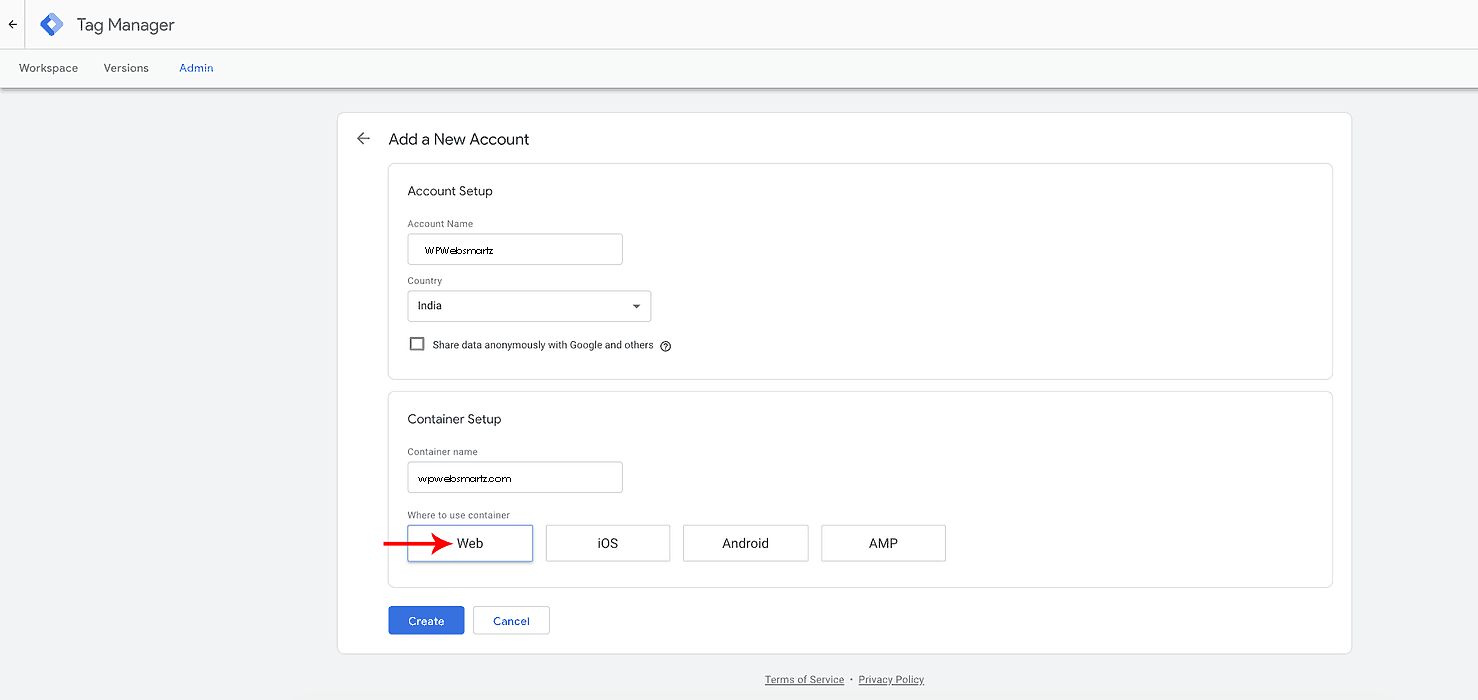
Create a new account in google tag manager with the domain name. Select WEB under “Where to use container”
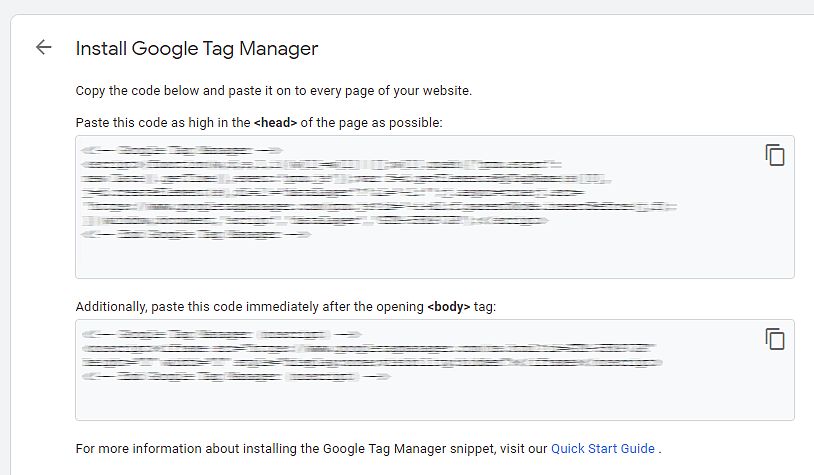
After creating the account you will be prompted to add two types code to header and body section of your website. Add both codes to the correct place.
Step 4. Creating trigger
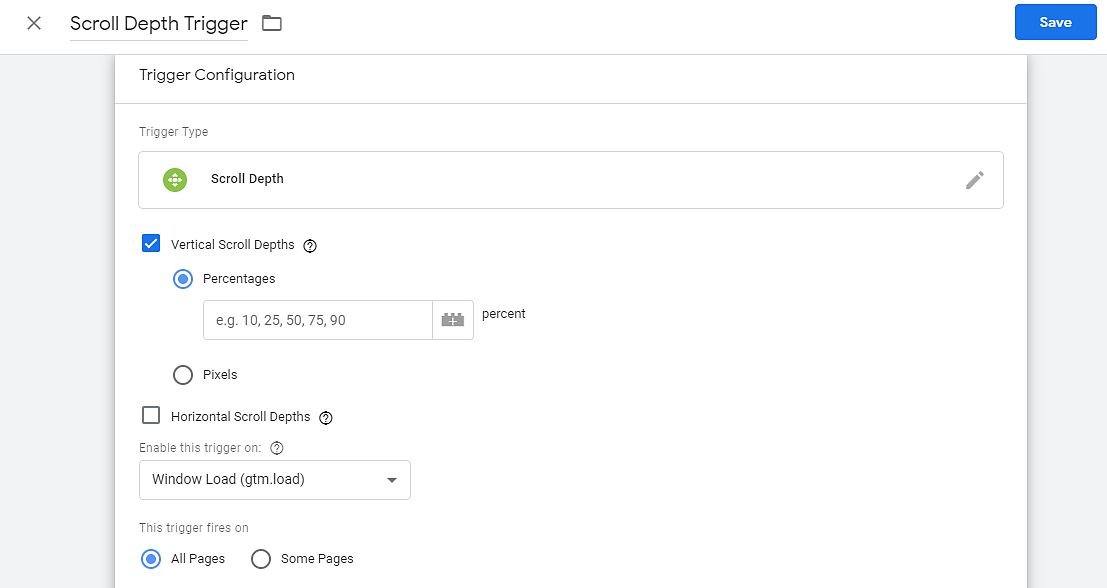
Now you need to head over to the “Triggers” section of your account, and click on to create a trigger. Give a name it then clicks the edit button upper right side.
In the chose trigger type you can see scroll depth under “User Engagement” click scroll depth there. Then enable Vertical Scroll Depths. Add percentage valuers like 25,50,75,100 don’t put any marks after 100 (ex:,.). Select all pages under “This trigger fires on” then click save.
Step 5. Add Variables
Now go to the Variables section in the menu section. Enable these values under the scrolling section.

- Scroll Depth Threshold: A numeric value that caused the scroll depth trigger to fire.
- Scroll Depth Units: The unit of scroll depth – pixels or in most cases percentage.
- Scroll Direction: The direction of the scroll – vertical or horizontal.
Step 6. Create an event tag
This will be the final section of this setup. In this step now you link your google tag manager account to google analytics account.
Go to the tag section’s main menu. Click the new tag button, name your tag then click the edit button.
In Choose tag type select “Google Analytics: Universal Analytics”


Select “Event” under Track Type, Under Category Type “Scroll Depth” under Action add this value {{Page Path}} or you click the plus button you can see all these values just click it then it will be added itself.
Under the Label section add {{Scroll Depth Threshold}}% value. don’t forget to put a % mark at the end.
Under Non-Interaction Hit select “True”
Now in Google Analytics settings, Select Variable then add you google analytics code there, then click save now your google tag manager linked to google analytics account. The scroll depth data start to reflect on google analytics.

Now test your Scroll Depth by visiting any page or post of your blog. Scroll top to bottom one of your web page.
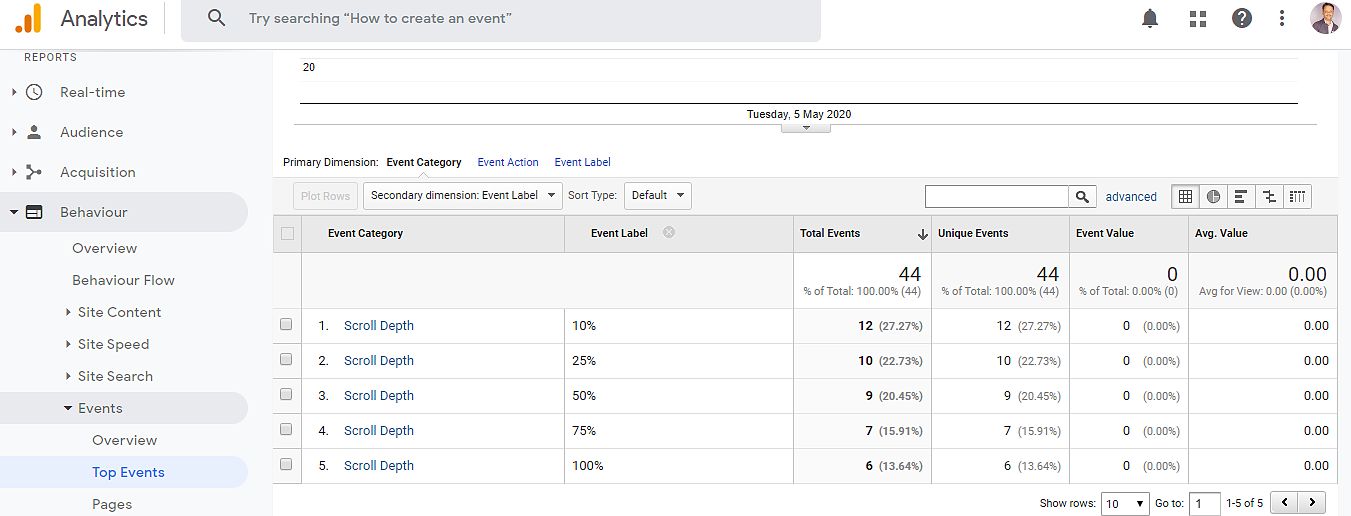
Step 7. Analyzing the Scroll Depth Tracking in google analytics.
Then log in to your google analytics account. Go to the event under “real-time”, Then click Events (Last 30 min) on viewing now you see the data you have scrolled recently.

Then move to Behavior-Events-Top Events, Now you can see event history in detail by percentage.
See the same data in the WordPress dashboard by MonsterInsights plugin. If you don’t see the scroll data, set the date to the custom range. Now you can see the scroll tracking stats are bottom of the MonsterInsights publishers report after Interests section.
We hope this article helped you learn how to track scroll depth on your WordPress site using Google Analytics. If you feel great about this article and plugin, Please do share this with the needed ones.
Check out this plugin if planed to install and get benefits of this great plugin


