Free Website Chatbot: Connect with Customers in Real-Time
As business owners can do chat in real-time with customers is helpful for both business owners and site visitors or customers. So, use this free website chatbot to your any type of website.
With this, you can hear your customers in real-time. When a customer to your website you can start to chat with them by free chatbox. You can chat with them with some personalized messages if he is log in.
If he is not creating an account on your website, then invite them to create an account and ask them to get benefits by creating an account.
So, here we help you with the setup of the Sendinblue free chatbox with your website. By this, you can take advantage of real-time contact with your customers.
Sendinblue free website chatbot setup:
Before starting to set up a free website chatbot, create an account. Click on sendinblue.com to create an account. If you already have an account then it’s better to log in to your existing account. Or go to their app directory to the setup of the free chatbox.
After login into your sendinblue.com account dashboard, you can see the plus mark on top of your dashboard.
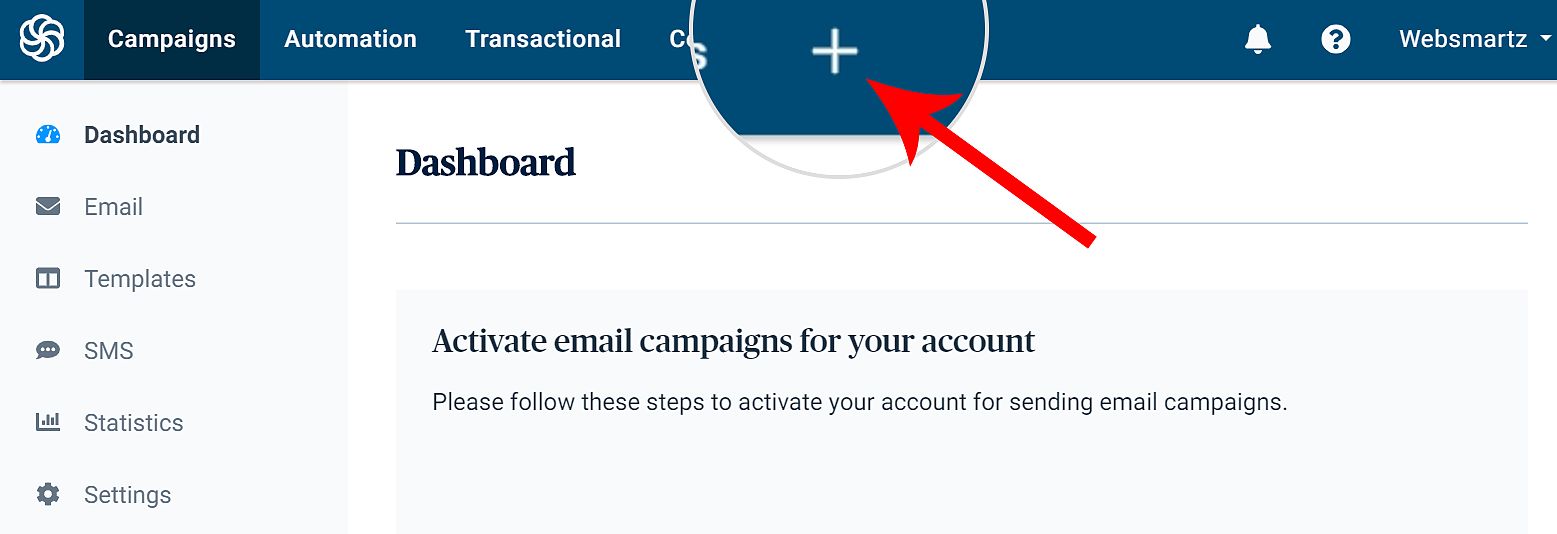
Clicking on the plus mark will take you to the app directory, there you will see their other apps including a free website chatbot.
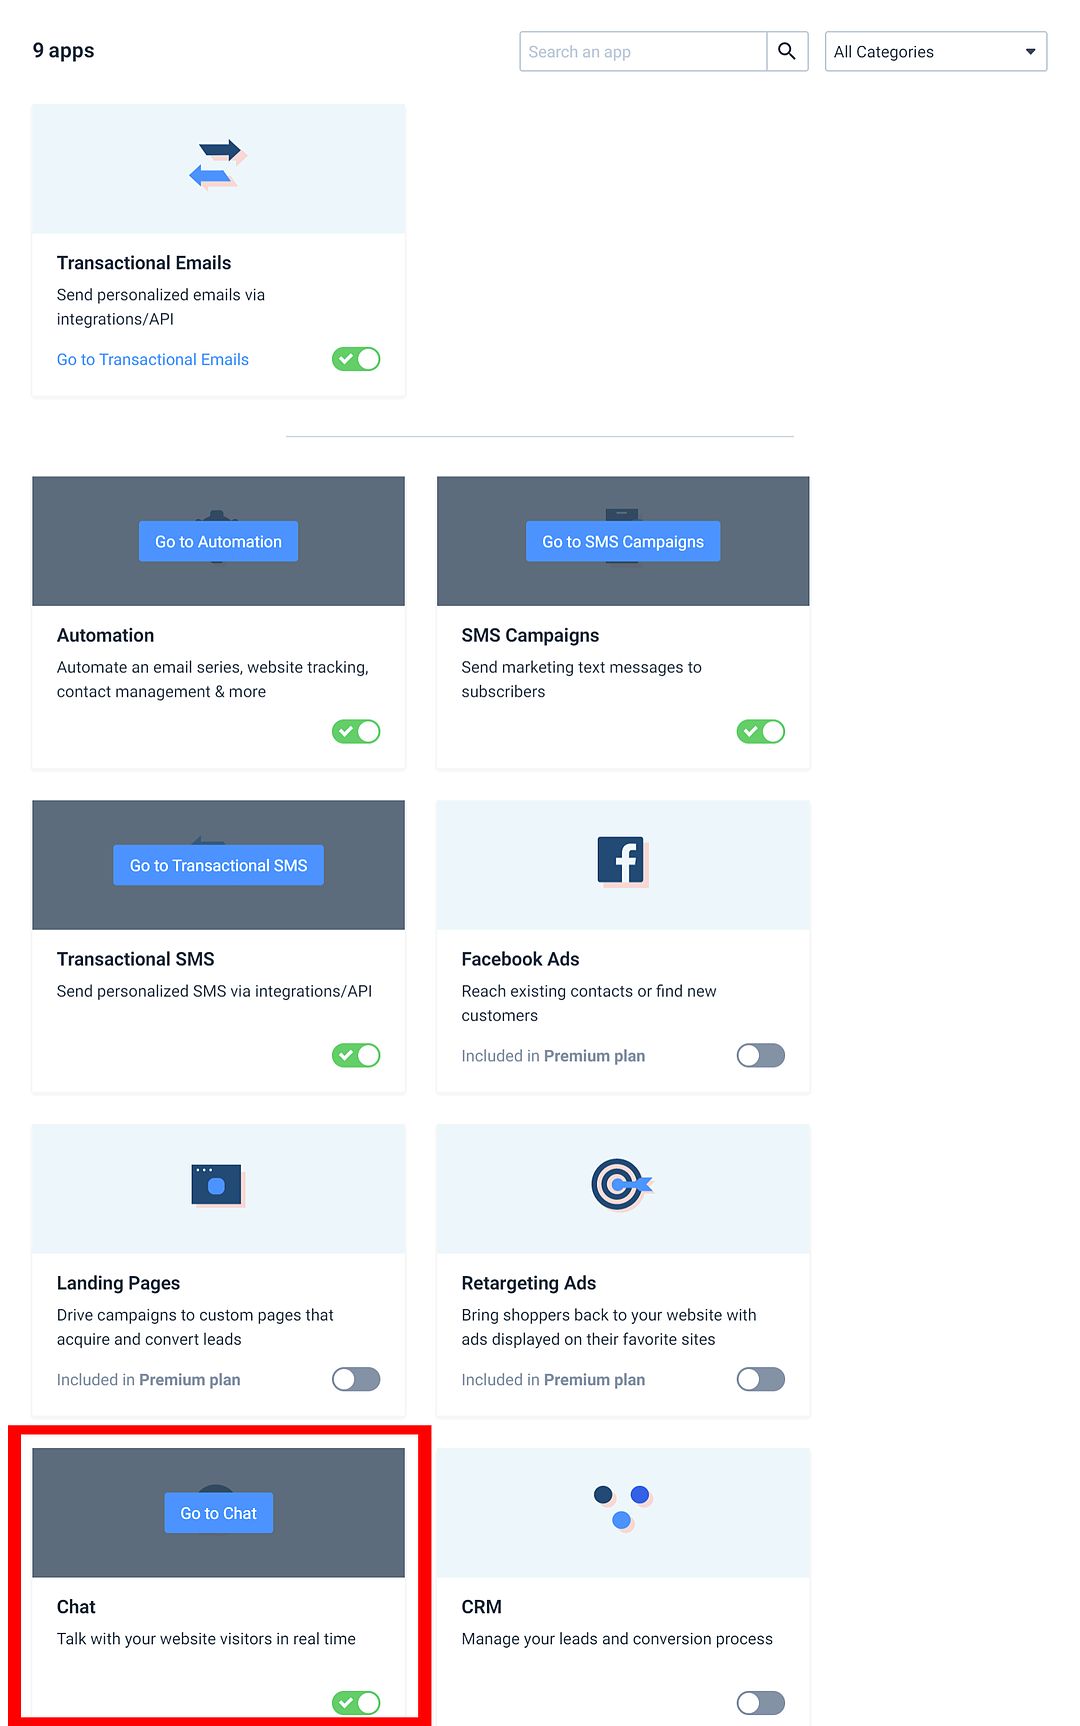
Upon activation, you will notice the “Go to Chat” button will be activated.

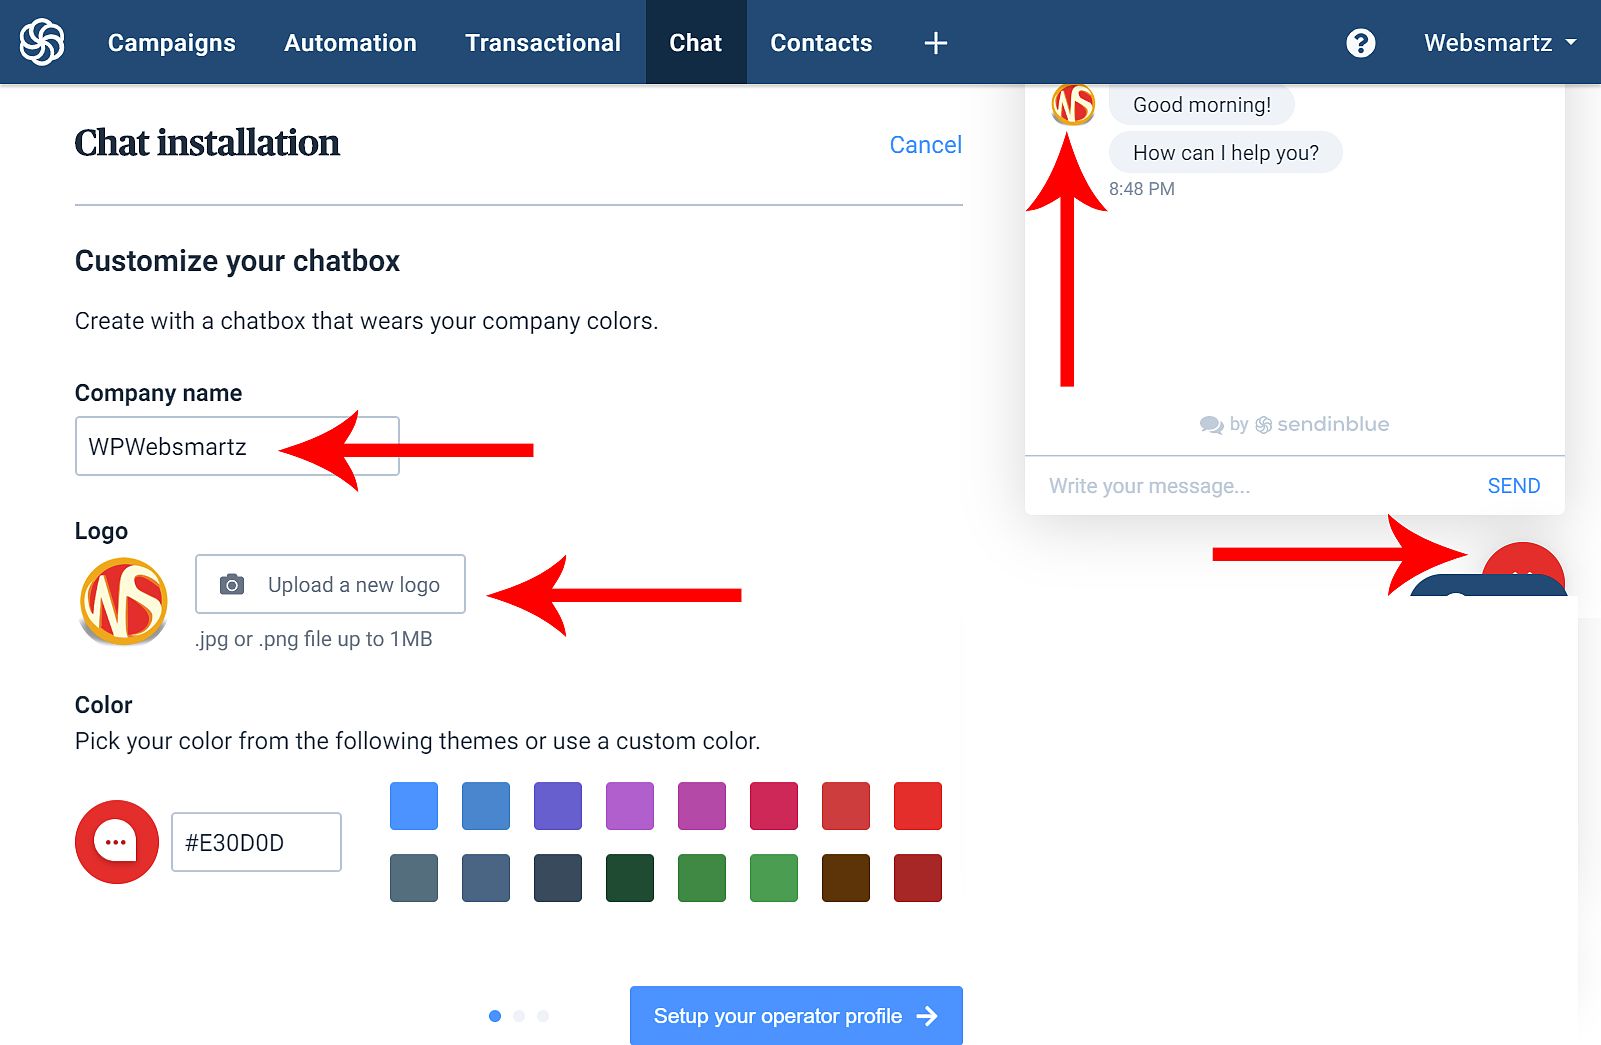
So, click on “Go to Chat”, now it will take you to the chat installation dashboard. And there you see all related settings of the free website chatbot. such as
- Company name (Your company name or website name)
- Logo (Your company logo, or website logo)
- Color (Sett this to your website color for a better look to visitors)
If you use a custom color that is not on the chat installation dashboard if so search here for a custom color code. You will find it suitable with dragging on the color picker and copy the color code then paste it here in chat installation.
See the demo of HTML color codes. You will find the color code in the “#F84D29” format.
Now come back here to chat the installation dashboard, and click on “Setup your operator profile” after inserting the color code.
Setup your operator Profile
Next, it will take you to “Setup your operator Profile” and enter all fields with your personal identifications that asked such as
- Operator name (Your real name or Representative of your company)
- Photo (Your real photo or photo of a representative)
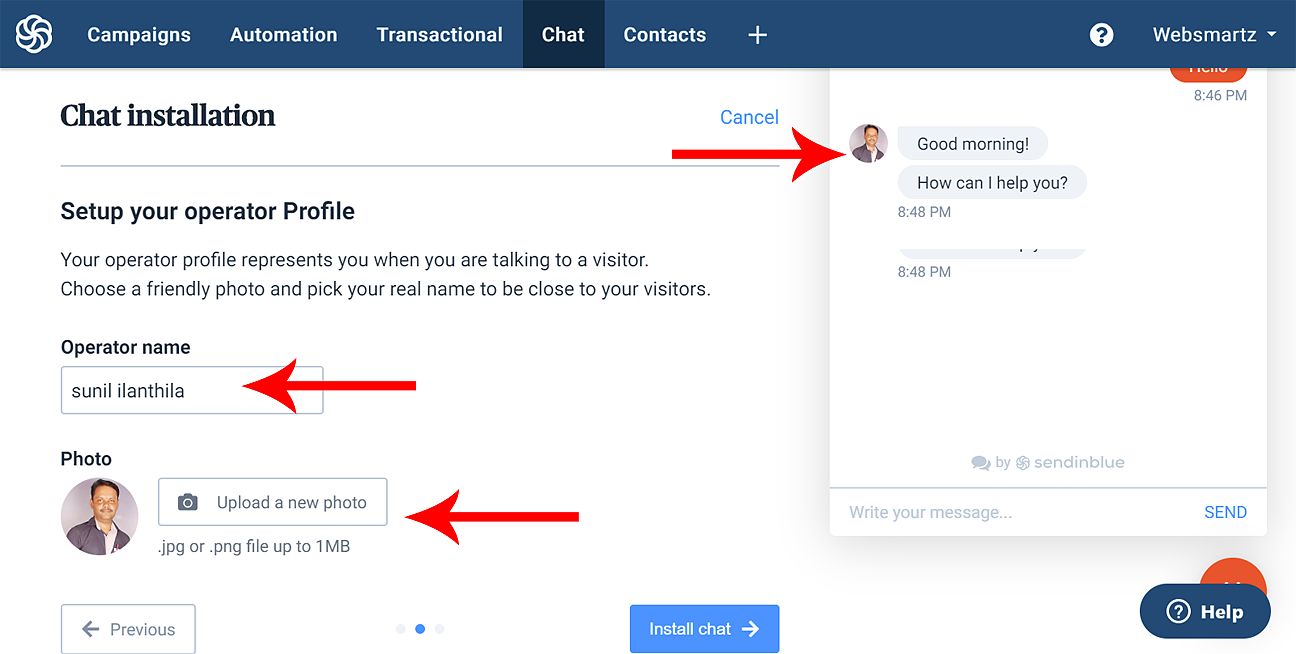
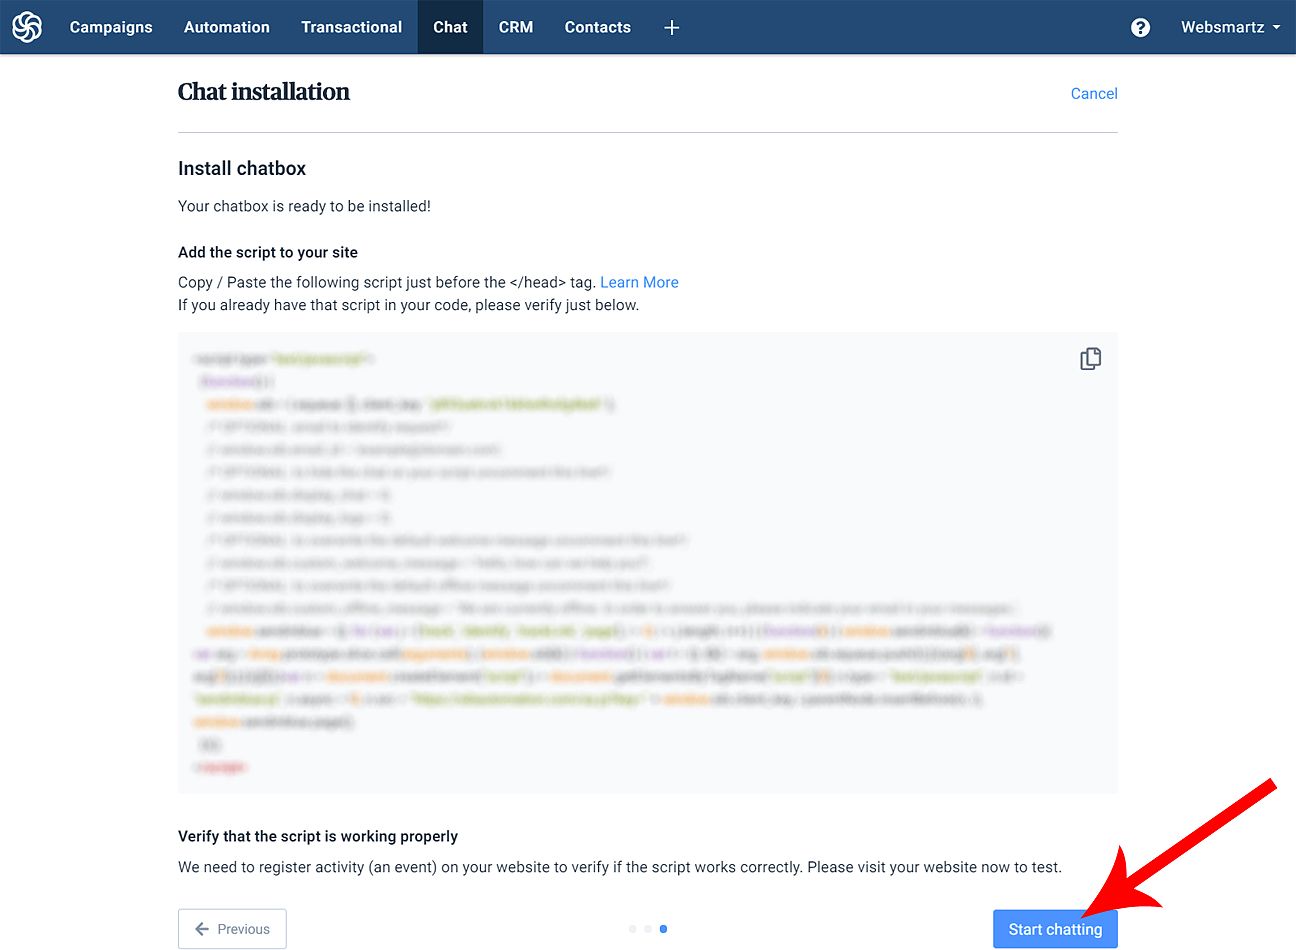
After entering your personal details click on “Install chat”. Now it will take you to the “HTML-integration” page, which means you should be added an HTML code to your website header section. You to see a message like this (Copy / Paste the following script just before the tag)

Here don’t waste your time adding this HTML code to the header section of the website. I mean it’s a bit of a critical technical process.
Sendinblue providing proper plugins to fulfill this step. If your website is running by WordPress then install their WordPress plugin to complete this verification process.
In this article, I will take the WordPress website to complete this process. So Sendinblue providing the WordPress plugin to connect your WordPress website with Sendinblue. So, install the “Newsletter, SMTP, Email marketing, and Subscribe forms by Sendinblue” plugin to your WordPress website.
For installation of a WordPress plugin, read our ultimate guide on how to install a WordPress plugin.
On the other hand, your website running by any other platform, then please search Sendinblue for a proper plugin to your website.
They providing these types of plugins.
Install and setup the Newsletter, SMTP, Email marketing, and Subscribe forms by Sendinblue” plugin
After installations and activation of the Newsletter, SMTP, Email marketing, and Subscribe forms by the Sendinblue” plugin. Goes to Sendinblue in the sidebar menu of your WordPress website.
There you will be the two steps which are Step 1 | Create a Sendinblue Account and Step 2 | Activate your account with your API key. Here you go to step two.

Here it will ask you to enter the API key to connect your website to the Sendinblue account. To find the API Key click on Get your API key from your account. You will find this on your step 2 tab above the “Access Key” box
After clicking on Getting your API key from your account, it will take you to the SMTP & API page of Sendinblue. Ther you see the two types of ” API KEY”. But copy the v2 API key and past it into the “Access Key” box on your WordPress dashboard.

Once inserted in the API Key, click on the login button. Now the Sendinblue account is open on your WordPress dashboard. There you go to the “Automation” tab. Here enable the “Yes” checkbox of “Activate Marketing Automation through Sendinblue”. Now the script installation process has been completed on your WordPress website.
Install the Insert Headers and Footers Plugin for easy verification.
One of the chances, if you find the above process is difficult to follow. So, follow the easy process, I will explain to you this easy process.
For this process, you will need to install the “Insert Headers and Footers” WordPress plugin. Upon installation go to Insert Headers and Footers settings, you will find this on Settings >> Insert Headers and Footers.
Hence, once open the settings page of the “Insert Headers and Footers” settings page, there you will see the three columns as Scripts in Header, Scripts in Body, Scripts in Footer. On the “Scripts in Header,” insert the copied HTML code then click the save button.

Once inserted the copied HTML code to your WordPress website, now click on the verify button below. Ones Sendinblue verifies the installed code on your website, Once verified, the verify button turns into “Start chatting”.
After verified now you can see the chat button on your WordPress website. The chat button will appear on the bottom of your website, it will look like the picture below.
On the other hand, your Sendinblue chat box looks like this.
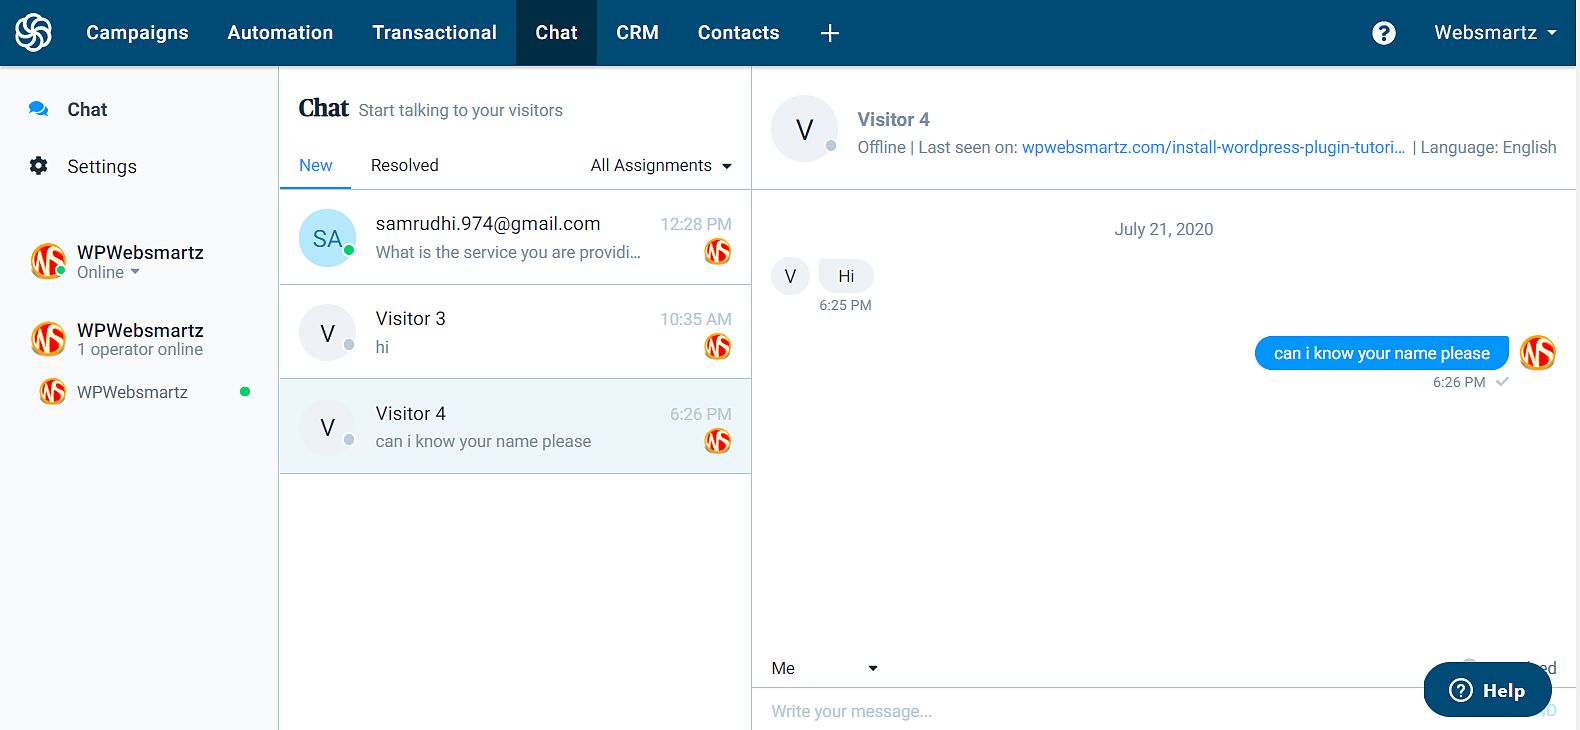
free Website Chatbot Settings
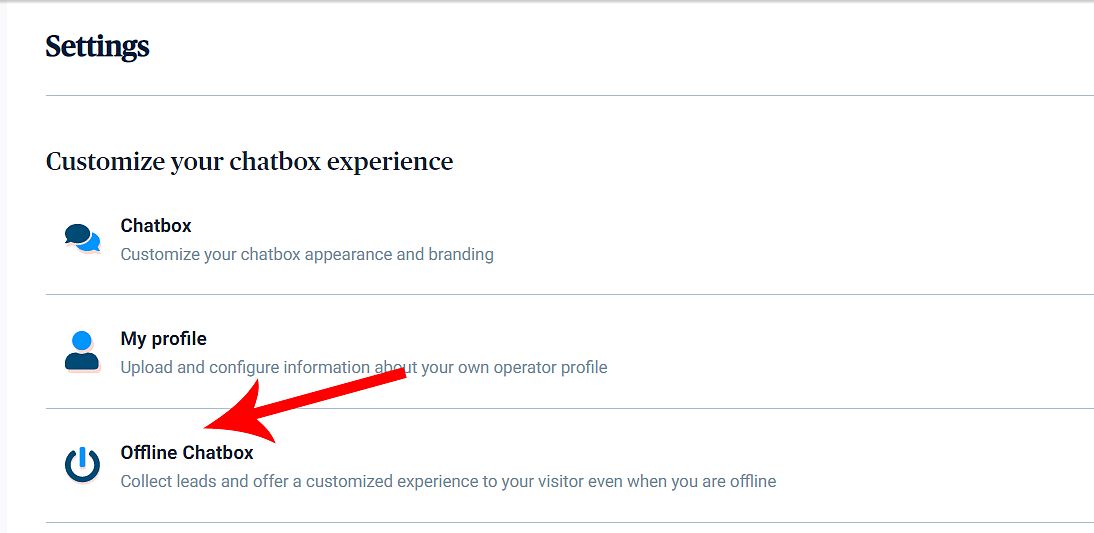
After installing the chatbox, now do some settings on your brand new chatbox. For this, click on settings on the sidebar of your chatbox, where you can customize your chatbox experience.
Here in the customize your chatbox experience, you can customize the Chatbox, My profile, and Offline Chatbox. But you already customize your chatbox and profile at the beginning of the installation.
But in the Offline Chatbox, enable this because visitors can contact you when you are offline. Here you can ask for their email address to contact them later by email.

Inform your operators and visitors when they get a new message
If someone comes to your website and going to your chatbox, here he gets an offline message but he wants to contact you. So, they drop their email address to a later conversation.
So, you can do this kind of settings on “Browser notifications” you can find this on “notification. Shortly it is, Inform your operators and visitors when they get a new message > Notifications

Here you can find two types of notifications as Browser notifications and Email notifications
Browser notifications
Here you can get a browser notification when someone starts a chat with you.


In Email notifications, you can see three types of options such as
- A new conversation is created (You get an email notification when some start to chat with you)
- A new message is received while I am offline ((You get an email notification when some start to chat with you if your status has become offline)
- A conversation is assigned to me

On a chance, if the visitor starts a conversation, on now, Sendinblue sends you a conversation notification to your email id. The conversation email notification looks like this.

And finally, in the more section, you can find the “integration” and Manage your chat-bot box”
Therefore, In the integration, this one is “HTML integration” you have already completed this step in the beginning. This means you are already added HTML code in the header section of your website.
Then in the “Manage your chatbox language” section, you can set a default language here from the drop-down. Not only this, but you are also free to add more language to the chatbox.

Final thoughts of the free website chatbox
That’s it now the free website chatbot for your website installation process has been completed. The free chatbox is very helpful to every serious website owner. By this, you can do a conversation in real-time. This kind of service will give visitors a personalized feeling.
Please keep in mind this service from Sendinblue is completely free. If you find this tutorial useful to you, then please share it with the needed ones to take advantage of.
On the other hand, if you want to add this free website chat box to your website. you can hire me. I am ready to give a reasonable service. You can contact me here to do so.