Step by Step Guide How to Create Online Donation Forms in WordPress

Do you plan to collect donations from your WordPress website? You can easily collect donations from your WordPress website with WPForms. Here we have done make a tutorial about how to create a donation form on WordPress.
If you are a part of a non-profit organization, I might think this tutorial for you.
WPForms giving such kind of features you to do collect easily donation from your WordPress website. WPForms one of the best contact form plugin for WordPress.
Different between a donation button and Donation form?
customize the form fields to gather the information you need.
keep donors on your own website for a more professional experience
Can i get additional information by this online donation form
Yes, you can get additional information by a user by customizing the form fields to gather the information you need.
Creating a donner form in WordPress is a bit tough. But WPForms make this process easy.
In this article, I will show you step by step on how to create an online donation form in WordPress.
WPForms is one of the leading online drag and drop form builders. It is famous for its beginner-friendly interface and pre-built form templates. It also has a donation form template.
For creating an online donation form you must have the PayPal or Stripe addon. Both are available on the Pro and Ultimate licenses.
Follow the steps below to how to create a donation form
Step 1: Install and Activate WPForms
For installation and activation of plugins logging into your account at WPForms and download the required plugins.

Then you’ll need to install and activate the plugins. You can see our step by step guide on how to install a WordPress plugin for more details.
Step 2: Create Your Online Donation Form
Now to proceed to create a donation form. For this click on WPForms » Add New
WPForms gives you the pre-built templates. you can select one of it, then you can customize it as you want.

Here you can see the pre-built templates of “Donation Form”. Click on it, now you are redirected into the drag and drop form builder interface.
On the form builder interface, all fields are added automatically. Now you can add any additional fields to the builder as you want.
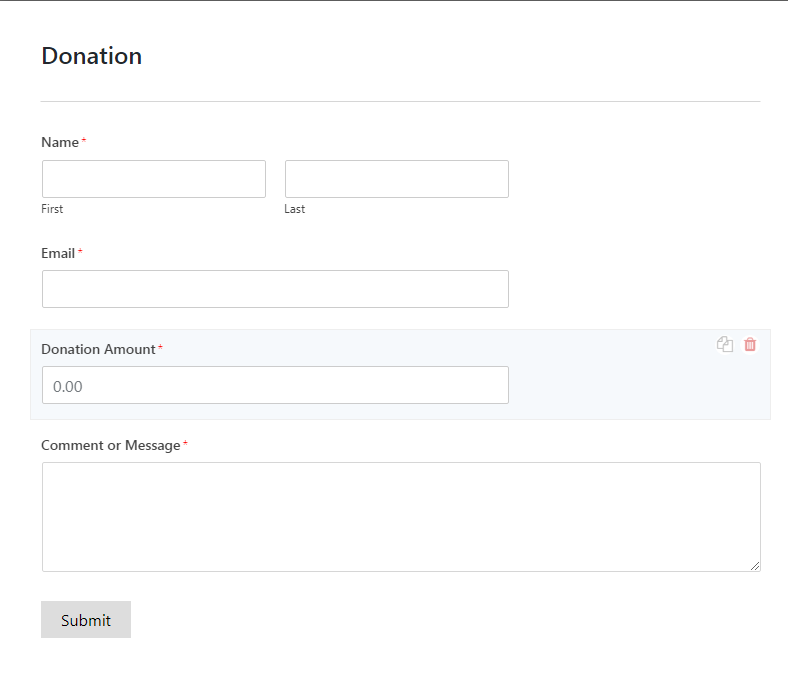
Here if you want to add a particular amount field to your donation form, it will need some customization.
You can use multiple choice or drop-down fields to get a fixed amount on your donation form.
Step 2: Multiple choice or drop-down fields Set-up in a donation form
Add a drop-down field to the form builder interface. And click on “Dropdown” here in the builder area. Now you see the field options of the dropdown
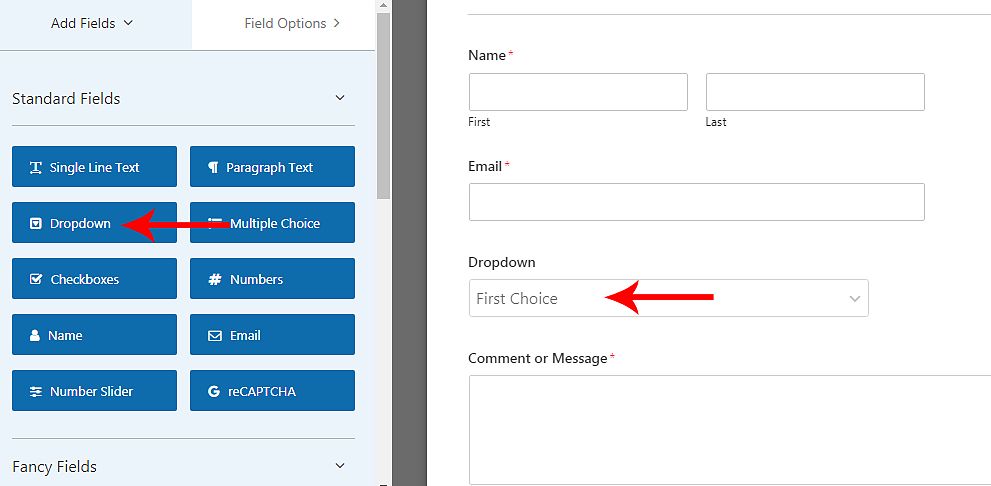
In the field options add value in the place of “First Choice” “Second Choice and “Third Choice”. Here in this tutorial, I replace it with “$10, $20 and $30”. If you plan to add more values, click on the plus (+) button. and add the value you prepared.

On the visitor’s point of view, if he wants to donate more than you specified on your donation form give him a chance to donate his/her specified amount.
For this do a simple trick, In the “drop-down” already you added on your donation form. Click plus button and add a value of “Enter Amount”. This one helps visitors donate their own prepared amount.
Under the Payment Fields, you can see the “Single Item” field. add it on your donation form, make sure which has been placed under the drop-down field.
Step 3: Customize the “Single Item” field on the donation form
Click on the “Single Item” field, go to field options, don’t check the “Required” checkbox, it will prevent users from submitting the form if they selected a donation amount in the drop-down field above.
Make sure, Under “Item Type” select “User Defined”, now field allows adding an amount to donors. Don’t enable the “Required” checkbox.
If you want to show the visitors an amount or any massage on the “Single Item” filed, add an amount or any text under “Placeholder Text”.

Step 4: Set Up Payment Integration
Now add a payment gateway to this donation form to get donations by your online donation form.
For this, you have already installed the “PayPal Standard” add on. This add on help you collect donations.
On the donation form creation interface. go to the payment tab. There you will be see the “PayPal Standard” click on it then enable the “Enable PayPal Standard payments” check box. Enter your PayPal email address under “PayPal Email Address”. Under “Mode” tab select “Production” from drop-down.
Under “Payment Type” select “Donation” from the drop-down. Enter cancel URL under “Cancel URL” to send visitors if they cancel the checkout process. you can find this on the payment page of PayPal. This is one of the pages of your website. You can add here any page as you want.
In the donation, there is no need for any shipping address, But if you want their additional information to get, select on of option from the drop-down.
Next in “Don’t ask buyer to include a note with payment” you can enable or disable this checkbox. This on help to ask donors to include a note during the Paypal checkout.
On the online donation form creation process no need to use conditional logic.

Step 5: Customize Your Notifications
The notification is very important to a visitor after he completes the donation. This will helps the visitor to make sure that receiving a confirmation email after he donates.
If you want to customize the email notifications for your form, you can click on Settings » Notifications.
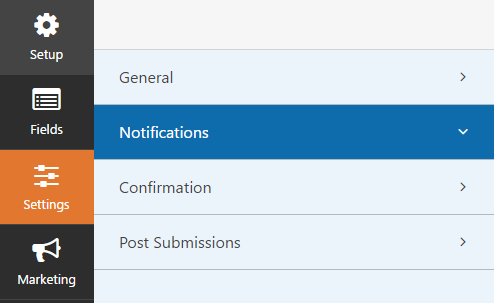
You’ll see there’s a default notification that will be sent to the site administrator. You can click the Add New Notification button to create a separate notification for the donor.
Click on “Add New Notification” and enter a notification name.

Then you should make some changes, by default the notification will be sent to the site administrator.
Next to Send to Email Address, click Show Smart Tags. In the list that appears, click Email. You’ll see a smart tag such as {field_id="1"} appear.
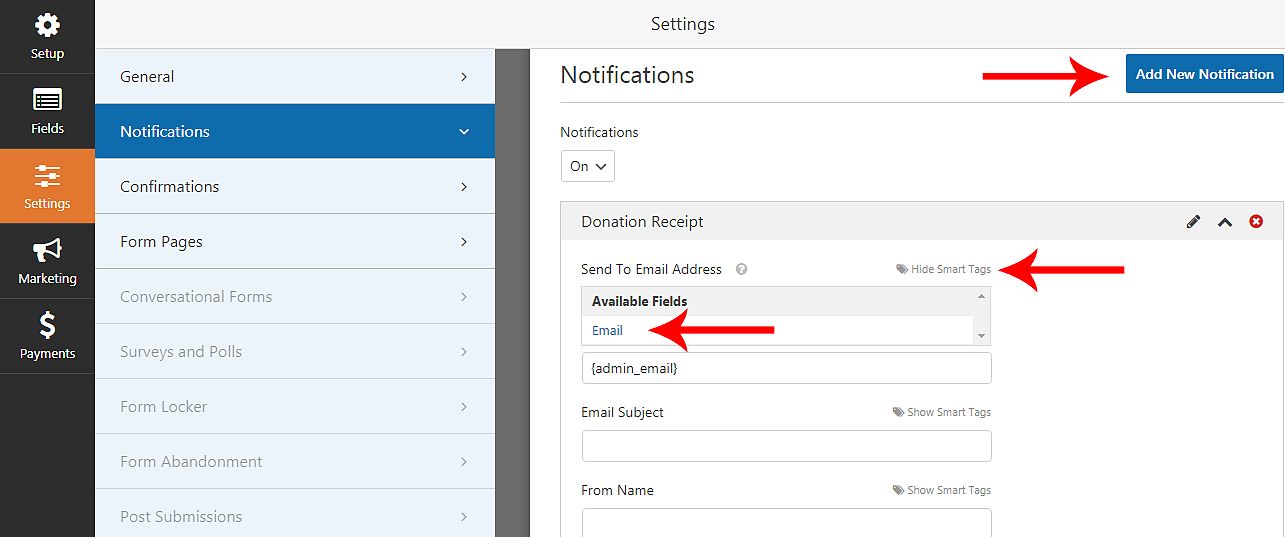
Here you can change all the fields by clicking the “Show Smart Tags”. That such as
- Email Subject
- From Name
- From Email
- Reply-To
- Message
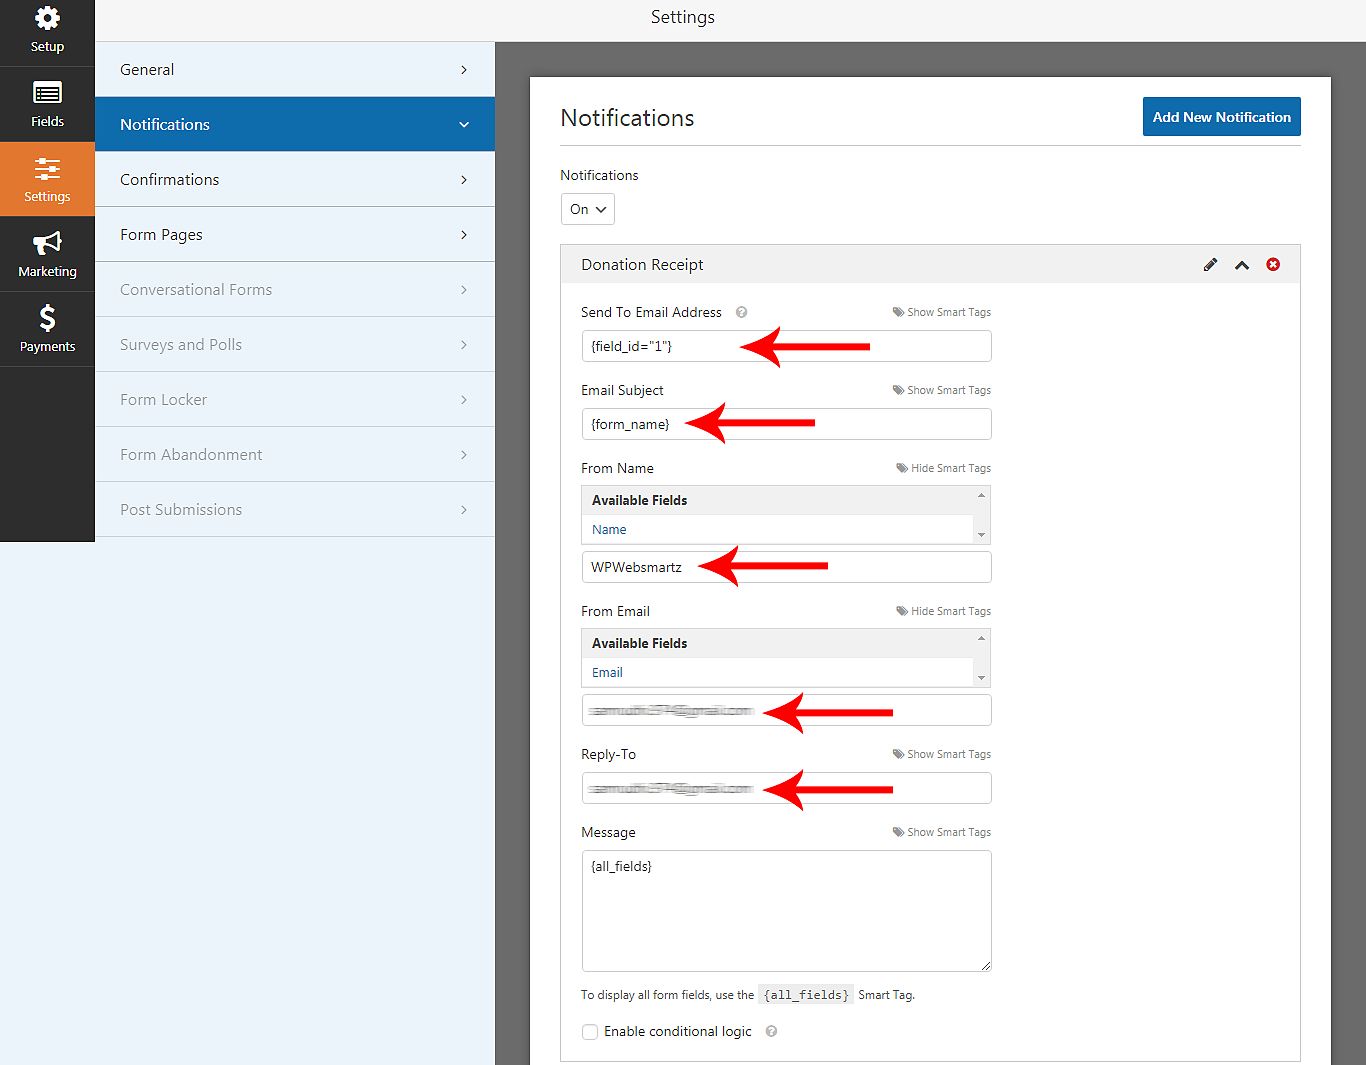
In the message tab, enter a beautiful customized message to the donor. This might be a good opportunity to try to re-engage with users by sending them to a relevant blog post.
Step 6: Place Your Donation Form on Your Site
Now online donation form creation process is over, Now place it your form to a post or page.
Simply create a page or post and click on add block plus (+) mark then search “wpform” on search box and select your donation form from drop-down.


Step 7: Final thoughts about online donation form
After placement of donation form add donation page to your menu so visitors can easily find it.
The online donation form needed for NGOs, Charities, and Social Help Groups. You can collect donations from people who love social work and Nonprofit Organizations.
On WPForms WordPress plugin you can easily create online donation form by drag and drop.
This is an amazing tool for beginners and advanced users. You can easily create any kind of form without hiring a developer.